Finishes to protect and bring out the beauty of your log home.
Lifeline Application Guide
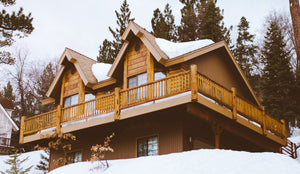
Lifeline finishes distinguish your log home. All Lifeline finishes are water-borne, durable and highlight the natural beauty of your log home. They are available for both your interior and exterior walls.
Why apply an exterior finish?
- To make your home look its best.
- To protect your home from UV damage.
- To protect your wood from water damage.
- To provide protection from unsightly mold and mildew.
There is no secret in retaining the beauty of your log home. A little care and maintenance along with the use of quality products designed specifically for log homes will not only keep your home looking great but will also preserve the integrity of the logs and help prevent costly repairs. You can do no better than selecting any of Perma-Chink Systems’ Family of Log Home Products.
Lifeline Ultra-2™ followed with a clear topcoat of Lifeline Advance™ Satin or Gloss combine to form the ultimate exterior finish system for your log home. Through many years of research, development and experience, Perma-Chink Systems has perfected water-borne finishes that provide the following benefits.
- Lifeline stains and topcoats provide the best-looking finish you can find. They distinguish your home by highlighting the grain and texture to bring out the natural beauty of your wood. Compare them to any finish you can find. Others have tried to copy the look and performance of Lifeline but never succeeded.
- Lifeline’s high-performance polymers encase the wood fibres to protect the surface, where the protection is needed. Lifeline forms a flexible coating that expands and contracts to accommodate seasonal expansion and shrinking of the wood.
- Pigments and Ultraviolet (UV) inhibitors are important components for protecting wood. Although UV inhibitors help extend the life of the finish, it is the pigments that provide long-term protection against UV rays while highlighting the natural wood grain appearance. Both Lifeline Ultra-2 and Lifeline EXterior contain these necessary, valuable pigments.
As the finish wears off, pigment weathers away at the same time. Then, as maintenance coats are applied, you avoid the build-up of pigment that occurs with conventional exterior finishes. The result - Your home still looks as good after years of maintenance as the first time you finished it. Conventional exterior finishes build up layer after layer of pigment on the wood, making your house darker each time you apply another maintenance coat. The Lifeline system gives you the choice during maintenance coats to use pigmented Lifeline and/or clear Lifeline Advance topcoats. - All Lifeline stains breathe to allow the wood to dry naturally as they protect wood from absorbing moisture from rain, snow and humidity, which also helps to minimize checking.
- Lifeline finishes are easy to apply, release no toxic fumes, are not flammable and clean up easily with soap and water.
How to Maintain Your Exterior Lifeline Finish?
Initial application to your exterior is two coats of Lifeline EXterior or Lifeline Ultra-2, followed by one or two clear topcoats of Lifeline Advance Satin or Gloss protective finish. During inspection and cleaning evaluate the condition of the finish to determine if any areas of the home may need another coat of Lifeline Advance Satin or Gloss.
After these applications of Lifeline, your exterior should require little or no maintenance, other than cleaning, for a period of about 3 to 5 years. If local weather conditions are severe or if moisture content of logs is high (over 20%), additional maintenance may be required.
Maintenance should consist of the following:
- Semi-annual inspection
- Periodic cleaning
- Maintenance coats
You ask your exterior finish to do a lot. You expect it to protect your walls from the damaging effects of temperature variation, wind, rain, snow and sunlight. The effects of these elements will occur at different rates on different parts of your home. Typically, walls with southern and western exposure (which normally receive more sunlight and heat exposure) weather more quickly than walls with northern and eastern exposure. Walls protected by deep roof overhangs weather more slowly. Any wood surface exposed to repeated wet/dry cycles will weather more rapidly than protected areas.
Log ends should be carefully inspected, protected and maintained. Log end grain absorbs water at about 10 times the rate as longitudinal grain. Protect log ends with Log End Seal™ to help prevent the problems associated with wet wood (mold/mildew, rot and insect infestation). Sap bleeding out of logs can take place during the first years of seasoning and sometimes indefinitely. Wood finishes cannot prevent or control sap bleed. Sap can be removed from the surface by chilling with ice, scraping with a putty knife or removing with mineral spirits or alcohol.
Over time, checks open up in logs. These checks expose new wood to moisture brought in by wind and rain. Water-soaked wood swells and shrinks more than protected wood, resulting in more checking. Be sure to seal upward-facing checks that are greater than 1/4 inch wide if exposed to blowing rain or other water sources. Treat with Shell-Guard® (borate-based wood preservative) prior to sealing if checks have allowed water into the core of logs. Make sure checks are dry and free of loose material.
Note: Round logs tend to weather (fade or darken) on the upper half of their outside surface because of the direct exposure to sun and rain. They also provide a surface upon which airborne contaminates settle. Usually, weathering and dirt shows first on these surfaces.
Inspection
Before we start discussing the inspection, here are a few tips. First, make a diagram of your home that you can carry with you while you inspect. It does not have to be fancy, just a simple plan you can use to note where something needs to be done. Second, take pictures during your inspection. It’s amazing how something you see will disappear when you go back to look for it. Third, develop a checklist of things to look for that is relevant to your home. It’s easy to forget what to look for by the time you get to the third or fourth wall.
When inspecting the exterior, look for the following:
- Plants within 18 inches of exterior walls - trim back.
- Gutters and down spouts - should be in good working order.
- Foundation - wood should be at least 12 inches from the ground.
- Firewood - should be at least 18 inches away from home.
- Areas that are most exposed to weather:
- South and west walls, which usually get more sun exposure.
- Walls facing prevailing winds as they are exposed to more rain and dust.
- Patterns of weathering:
- Fading of the finish.
- Water stains on exposed walls.
- Evidence of water in exposed log ends.
Note: Make sure that no sprinklers direct water at the wall, including water patterns on windy days.
Get up close
- Look for dust, pollen, etc. on upward facing portion of logs:
- Clean with water or mild cleaning solutions (see Cleaning).
- Inspect for any signs of weathering of finish.
- Check water repellent quality of finish.
- Spray or splash water on walls and look for it to “bead.” If it doesn't bead and the colour is good, apply a maintenance coat of Lifeline Advance. If the colour is faded it’s time to apply a pigmented coat of Lifeline stain.
- Inspect for mold or mildew:
- On top of finish. (can it be washed off?)
- Underneath finish.
- Seal upward-facing checks (1/4 inch or wider) using Check Mate (treat with Shell-Guard first).
- Carefully inspect logs for signs of moisture (discoloured or softened wood).
- Pay special attention to all logs and ends extending to or beyond roof overhangs.
- Inspect the integrity of all sealant joinery (Perma-Chink, Energy Seal, Check Mate) at log-log inter- faces, windows, doors, checks, roof lines or any potential air or water intrusion points. Maintain as required.
Where moisture is a problem, a Shell-Guard treatment provides a safeguard against rot and insects. Contact Perma-Chink Systems, Inc. for more information.
Cleaning Existing Lifeline Exterior Finishes
Cleaning exterior walls is an important step in maintaining the appearance and durability of your finish. Exterior surfaces of the home are a settling ground for dust, pollen and other airborne contaminants, which dull the surfaces and provide food for fungal growth. Cleaning is also necessary to perform an adequate inspection of the condition of your exterior finish.
Wash your exterior finish just like you wash your car. The objective is to remove the contaminates without harming your finish. This can be accomplished by the following:
-
Always use mild solutions of cleaners* on the wall. Strong cleaners may damage your finish! If in doubt, try your solution in an inconspicuous area before proceeding.
Log Wash is specifically formulated for this cleaning application. Plan on cleaning small areas at a time since Log Wash needs to stay wet in order to do its job. - Always use a gentle setting on water nozzles, not a jet.
- Always use soft-bristled brushes or non-abrasive pads for cleaning.
Log Wash cleaning solution is best applied using a low pressure garden type sprayer
.
- First, wet the walls with mist from your garden hose. Work an area only big enough that the cleaning solution is on the wall for about 5 to 10 minutes.
- Apply the cleaning solution from the bottom up.
- After gentle scrubbing, be sure to thoroughly rinse all cleaners off the wall. Residue can prevent proper stain adhesion.
Remember to wash from the bottom up and rinse from the top down.
Maintenance Application
You should apply a maintenance coat of Lifeline when your finish has lost its sheen or it no longer repels water. Although the water beading may be gone, the film should still be intact. Remember, it’s not always necessary to refinish your entire house. Apply maintenance coats to those walls where it is required.
If the finish has faded and the color no longer looks right, it is time to apply a pigmented coat of Lifeline EXterior or Lifeline Ultra-2 to bring the color back. This also provides the protection that only pigment can provide. This is especially important to areas of the home that are exposed to sunlight. Then apply a clear topcoat of Lifeline Advance Satin or Gloss.
If the color is right but the finish has lost its sheen or is no longer water-repellent, a maintenance coat of Lifeline Advance Satin or Gloss. may be all that is required.
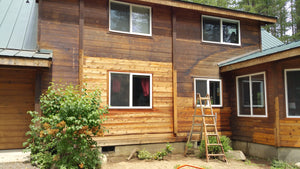
Preparation
Always make sure that your preparation includes cleaning all foreign materials from the walls. Check all wood surfaces for deterioration, decay, dirt, mold and mildew. You can usually distinguish mold and/or mildew from dirt spots by touching the suspect spot with a cotton swab soaked with chlorine bleach. If the bleach clears the spot, then it is mold and/or mildew rather than dirt. Repair decayed wood using appropriate restoration techniques. Contact Perma-Chink Systems for more information. If you detect signs of excessive moisture (darkened wood, excessive mold and mildew), remove moisture sources and treat the wood with Shell-Guard to prevent wood rot.
Be careful to follow all of the preparation and application instructions provided on the label to ensure that you get the optimum performance from your efforts and your finish. Read all of the instructions before you begin. Remember, consistent preparation is important because your finish highlights wood grain and texture and seals in any blemishes left during the preparation process.
Mill Glaze - On new wood, remove mill glaze by sanding, power washing or using mill-glaze treatments commonly available at your local paint supply store.
Old Finishes - If you are going to re-coat over existing finish, evaluate the adhesion of the existing finish by applying and peeling masking tape from the surface in a few areas. If very little finish is removed with the tape, the adhesion should be adequate to provide a base for your new Lifeline. If significant amounts of stain remain on peeled tape, remove the old finish before applying new Lifeline. In either case, surfaces must be clean and dry for your new coat of Lifeline.
If you are going to completely remove your old finish, you have a few options. If the old finish is seriously degraded, strong cleaners may completely remove it. However, in protected areas, removal is usually difficult with this method.
For complete finish removal, one option is to use our Blaster-Buddy and corn media. This non-chemical stripping method leaves wood dry with a surface that readily accepts a new coat of Lifeline. Another popular method of removing old stains is traditional pressure washing. Contact Perma-Chink Systems for more info.
If you prefer to use chemical strippers, we can supply a professional-strength stripper. Whenever you choose to use any chemicals during your preparation process, thoroughly clean all chemical residues from the wood surfaces to avoid any interaction they may have with your newly applied finishes. Additionally, carefully follow the manufacturer’s use and safety instructions. Remember, the quality of your preparation determines much of the finished appearance and durability of a new stain application. Contact Perma-Chink Systems for more info.
Graying Wood - If the wood surface has turned gray from UV exposure but is free from dirt and other contaminants, restore wood tone with Wood ReNew and/or Oxcon.
Dirt and Grease - If wood surface requires cleaning, use Wood ReNew to clean and restore wood tones.
Sanding - When sanding or buffing the wood, do not use steel wool. Steel wool leaves fine particles of steel on the wood that will cause rust stains.
Rust Stains - If you have rust stains on the wood surface from bands, nails or other sources, clean them with Oxcon. When using Oxcon, always treat the entire surface. Avoid spot applications.
Mold and Mildew - If there are mold and mildew stains on the surface of the Lifeline, some household chlorine bleach added to fresh water will probably help. Never use household bleach stronger than one part bleach to three parts water.
Note: When using a chlorine bleach mixture or any cleaning solution, always start application at the lowest course of logs and work up. Rinse from the top down. This will minimize any “streaking” that may occur from direct application of the bleach mixture.
APPLICATION TIPS FOR LIFELINE
- Application of Shell-Guard or any other borate-based preservative or specialty mildew inhibitors must be done before applying Lifeline. Failure to follow the proper application procedures may result in unnecessary work.
- Application of Lifeline can be made with brush or airless sprayer. Use a .015 to .017 orifice on your spray tip. Investing in high-quality brushes help make your work more efficient and professional looking.
- Always perform a colour test before the full application, especially if the home has been corn media blasted. Make sure the test is conducted on the same type of wood and surface preparation upon which you will be doing the application. The rougher the wood surface, the deeper the finish colour will be.
- If you spray Lifeline, back-brushing (brushing the wet Lifeline after spray application) eliminates runs and works Lifeline into the wood grain. Back-brushing can be done with a brush or painter’s pad. Back-brushing is required to work the finish into the wood for even color distribution and optimum protection. Brush out all runs immediately and observe proper coverage rates.
- Lifeline should never be diluted.
- Apply Lifeline when the wood surface temperature is between 40°F and 90°F. Avoid application in direct sunlight. Keep a wet edge to avoid lap marks. If there is to be a break in the application, always stop at a natural break point, such as a window or corner. Never stop in the middle of a log or course of logs.
- When multiple containers are required to do a job, they should be poured together (boxed) to ensure color consistency.
- Mix thoroughly before and frequently during use to avoid settling of contents.
- The first coat coverage of all Lifeline stains will be 350-450 sq. ft. per gallon on smooth wood. (On rough surfaces, coverage will diminish.) All subsequent coats should be applied at 600-800 sq. ft. per gallon.
- Thin, even coats provide best results. Do not allow Lifeline to build up on wood surfaces.
- Never tint or add colour to Lifeline clear topcoats (Lifeline Advance Satin or Gloss.)
- A few extra dollars invested in your brush can make a significant difference in the looks of the finished job, as well as the amount of labour needed. Do not take short-cuts!
Application of Lifeline Ultra-2 / Accents Exterior
Lifeline Ultra-2/ Accents Exterior requires two coats.
Apply the initial coat. Wait at least two hours (depending on temperature and humidity) for the initial coat to dry. Then apply a second coat for the classic Lifeline look.
The application should then be followed up with one or two coats of a clear topcoat of Lifeline Advance.
Application of Lifeline Exterior
Apply the initial coat. (We highly recommend using UV Boost in the initial coat, especially in areas that are subject to high intensity sunlight.) Wait at least two hours (depending on temperature and humidity) for the initial coat to dry. Then apply a second coat for the classic Lifeline look.
The application should then be followed up with one or two coats of a clear topcoat of Lifeline Advance.
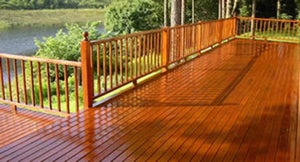
Application of Lifeline Advance Satin Exterior Clear Topcoat
Lifeline Advance Satin is a clear topcoat that provides an extra layer of protection against water, mold and UV, thus extending the life of the stain. Apply one or two coats.
Maintenance coats of Lifeline Advance, Lifeline Accents, Ultra-7, Lifeline Exterior or Lifeline Ultra-2 can be applied directly over Lifeline Advance. At some point in time, it may become necessary to completely remove old finishes and apply new Lifeline.
Lifeline Advance exterior clear topcoat is formulated for use over pigmented finishes and is not intended for use over bare wood.
Application of Lifeline Advance Gloss Clear Topcoat
Lifeline Advance Gloss provides a high gloss finish on wood that has been previously stained with Lifeline Exterior, Accents Exterior, Ultra-7 or Lifeline Ultra-2. (We do not recommend the use of Lifeline Advance Gloss over Pickled White (EX#150), Seagull (EX#152) or any other white or off-white finishes.)
One or two coats of Lifeline Advance Gloss are normally sufficient to create a reflective gloss finish on the surface of your logs.
Maintenance coats of Lifeline Advance Gloss, Lifeline Exterior, Accents Exterior, Ultra-7 or Lifeline Ultra-2 can be applied directly on top of existing Lifeline Advance. At some point in time, it may become necessary to completely remove old finishes and apply new Lifeline.
Lifeline Advance Gloss exterior clear topcoat is formulated for use over pigmented finishes and is not intended for use over bare wood.
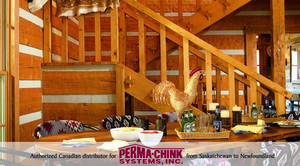
Application of Lifeline Interior
For optimal performance, apply an initial coat and back-brush into the surface. (We highly recommend using UV BOOST in the first coat of Lifeline Interior.) Wait at least two hours (depending on temperature and humidity) for the initial coat to dry and then apply a second coat for the classic Lifeline look.
For interior applications, you can apply additional Lifeline INterior coats to achieve the appearance you desire. Thin, even coats provide the best results.
Application of Acrylic Gloss and Acrylic Satin
Use as a quick-drying, high gloss or satin topcoat for finishing sealed or stained wood. Apply to cabinetry, wood trim and molding, furniture and interior logs. Acrylic Gloss/Satin spreads easily and evenly.
A sealing coat (clear or colour) of Lifeline Interior (UV BOOST is highly recommended) or Accents Interior increases coverage for Acrylic Gloss/Satin. Apply an initial coat of Acrylic Gloss or Acrylic Satin to sealed wood. Brush out runs immediately. If additional coats are desired, allow previous applications to completely dry between coats. Lightly scuff surface between coats with 180 grit sandpaper or screen to assure proper adhesion. Do not use steel wool or a wire brush because residues can cause rust stains in your finish.
Coverage for Acrylic Gloss/Satin is approximately 350-450 sq. ft. per gallon on log surfaces (600-800 sq. ft. per gallon on sealed logs) and 650-800 sq. ft. per gallon on mill-work.
Clean up
Clean up should start as soon as possible. Follow the manufacturer’s recommendations when cleaning equipment. Warm soapy water will clean up all wet Lifeline products. Lifeline stains or topcoats that have dried can be softened with alcohol or mineral spirits and then removed with warm water. Always dispose of empty containers in accordance with all federal, state and local regulations. Never use empty containers for storage of food or drinking water.
Storage
Store Lifeline, Acrylic Gloss and Acrylic Satin out of direct sunlight and protect from freezing. Keep unused material in tightly closed containers. We recommend that you dispose of Lifeline that has been stored over 1 year. Contact Perma-Chink Systems for more information.
IMPORTANT
Always perform a colour test before the full application, especially if the home has been corn media blasted. (Consider using AFTER-BLAST on blasted surfaces.) Make sure the test is conducted on the same type of wood that you will be doing the application on and that the sample has the same preparation as your home.
Normally, the rougher the texture, the deeper the finish colour will be.
Colour samples of all our stains and finishes are available upon request. Call any of our stores or send an e-mail to techservice@permachink.com.
Coverage rates per gallon (over smooth wood surface)
Lifeline Exterior, Ultra-2, Accents Exterior
350-450 sq.ft., first coat
600-800 sq.ft. second coat
Lifeline Advance Gloss and Satin
600-800 sq.ft.
Lifeline Interior, Accents Interior
350-450- sq.ft., first coat
600-800 sq.ft. second coat
Acrylic Gloss and Satin
350-450 sq.ft. (bare wood)
600-800 sq.ft. (sealed wood)
650-800 sq.ft. (millwork)
Lifeline Ultra-7
350-450 sq. ft.
Go to STEP 4 to get more information on our log home sealant application guide.
Stains and Finishes Application Guide 
Application Guide for Lifeline stains and finishes
Log Home Sealant Application Guide 
Application Guide for Perma-Chink, Energy Seal, Stack-n-Seal